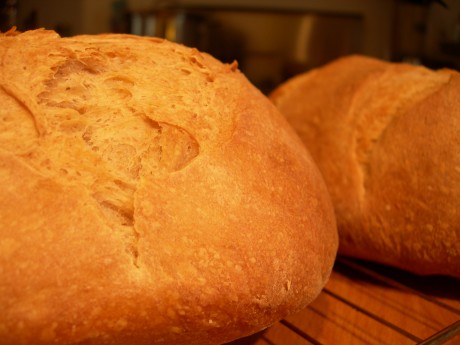
As an amateur chef, I enjoy a good challenge. Over the years, I’ve tackled quite a few of them – a flakey pie crust, an authentic bolognese, a delicate tamago-dofu. All of those adventures, though, now seem like weekend trips. For the last 8 weeks, I’ve been chasing the perfect loaf of sourdough bread. Part microbial safari, part spiritual journey, the process has left me with a new respect for bakers, for bread, and for the diminutive Candida milleri.
Betrayed by Jamie Oliver!
Jamie Oliver is my food hero. I know this won’t win me a lot of points with the culinary elite, but Jamie’s no nonsense approach to food, combined with a winning personality and an admirable dedication to social issues has always held a lot of appeal for me. His first book, The Naked Chef, led me into real cooking, and I’ve been stacking my shelves with his books ever since. Until page 257 of Happy Days with The Naked Chef, he had never let me down.
The simply titled recipe for Sourdough Bread on that page certainly fits within the Oliver mold. In just a page – 5 steps in 5 days – Jamie assures you that you can make great bread:
“Knotty and chewy with a holey texture and awesomely crisp crust… sourdough is the ultimate loaf.”
Alas, my results were less than awesome. I tried the recipe twice – 10 days later I had two dark brown, un-leavened doorstops. While it’s possible that I might have done something wrong, I had a strong suspicion that making sourdough might not be quite as easy as Jamie had made it sound.
The Science of Sourdough
Many of us have probably made bread with packaged yeast before. This yeast is a pure strain of Saccharomyces cerevisiae, the same yeast used by brewers to make beer. Granulated yeast, patented by Fleischmann’s, is most popular for home bakers, due to it’s potency, temperature resistance, and shelf-life.
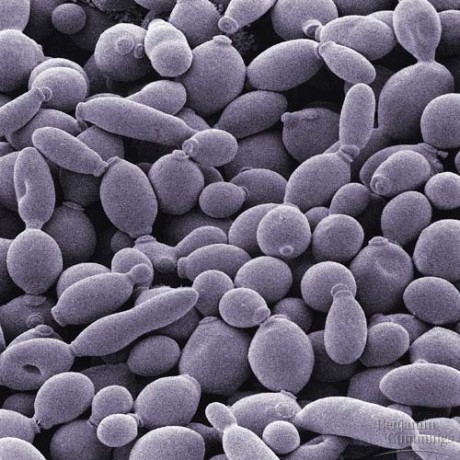
While packaged yeasts are monocultures, sourdough is leavened by a combination of wild yeasts and bacteria. Yeast strains like Candida milleri or Saccharomyces exiguus live in the culture with bacteria like Lactobacillus sanfranciscensis – it is this mix of wildlife that gives sourdough its characteristic flavour. The key to good sourdough is to get a good culture, filled with energetic and productive strains of micro-organisms that will rise your bread and make it taste good at the same time.
One of the intriguing things about sourdough is that it is geographically specific. Sourdough cultured in Vancouver will taste different from bread baked in Paris. By making your own culture locally, you’re capturing the flavours of your neighbourhood, a unique mix that couldn’t be made anywhere else. The first step in making sourdough is to get this culture – called a starter – thriving.
Getting a Starter Started
Making a starter is easy – mix together some flour and water in a jar, and leave it on the counter. Yeast and bacteria (from the flour, from the air, from the water, from the jar…) will take advantage of the free food that the flour provides and will quickly colonize the mix. What we want to do is to keep this culture alive for a while, letting the strongest and fastest-growing critters slowly take over.
A sourdough culture is kind of a real-life Tamagotchi. It’s a living thing, and you need to feed it regularly to keep it happy. Practically, this means refreshing the starter every day: dump out 95% of it, add fresh flour and water, and let the culture eat and grow. We end up with a population of microbes which hit a peak population in about 12-24 hours, then start to die off. As they eat, they produce gases, causing the mixture to bubble and froth. A strong culture will double in volume in about 12 hours after it has been refreshed:
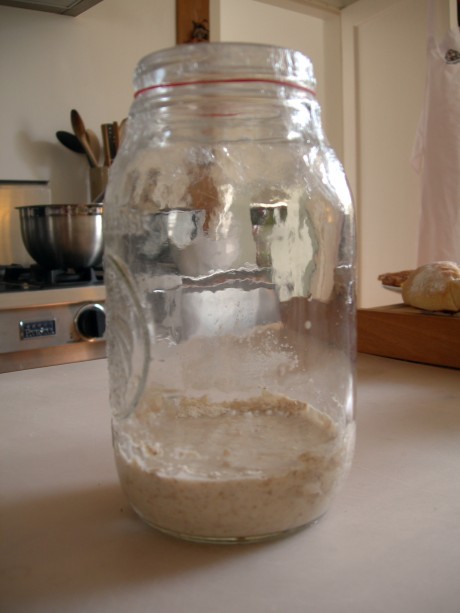
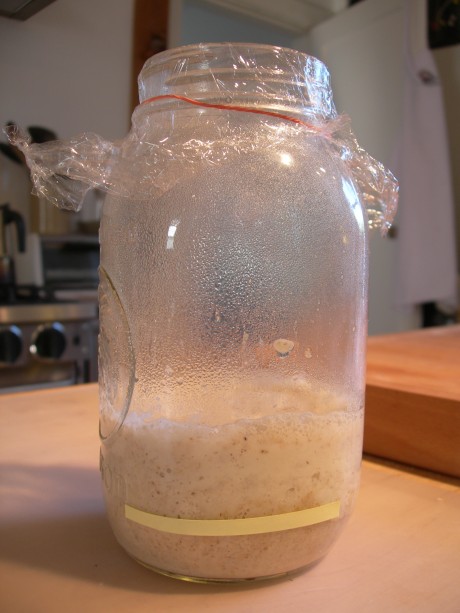
For my starter, I used de-chlorinated water, and a mix of organic unbleached flour and organic rye flour. Using organic flour is important, as the flour itself will contain yeast which will help the culture to get started. I followed the very helpful and detailed instructions in this tutorial to get my starter up and running.
Once a starter is thriving, it’s reasonably hardy. Once-a-week bakers can keep their starter in the fridge most of the week, refreshing it one or two days before the weekend bake. I left mine in the fridge for 10 days recently when I was out of town on business; it took just one feeding to get it bake-ready again. Tough things, these microbes!
Baking
So far, this whole sourdough thing doesn’t seem to hard: leave some flour and water sitting on the counter, and do a bit of regular maintenance. It takes a while (a good soudough starter might take two weeks to hit maximum productivity) but it certainly isn’t difficult. Now, though, comes the tricky part – making bread from the stuff.
As energetic as our starter might be, it’s probably not going to be as good of a riser as packaged yeast. The process of making a sourdough loaf is a slower one than making basic bread – all told, you’re looking at a minimum of about 8 hours of time from start to finish. I usually bake on Saturday – there are a few hour-long breaks and one long 3-hour one in the process which mean you don’t have to spend the whole day at home. The bread-making process can be broken down into four parts: kneading, proving, rising, and baking. Let’s talk about each of these parts individually:
Kneading is the part of bread-making that people are most familiar with. My memories of making bread in the past involved a lot of kneading, so I was surprised to find out that most bakers these days do very little (if any) of it. The current theory seems to be that it’s not the kneading itself that is valuable, but the resting period between kneads. For my loaves, I knead just 4 times, for 10 seconds each – less than a minute of kneading in total! In between kneads, the dough rests for about 10 minutes, letting the gluten in the dough form the long strands that give the finished bread the desired texture.
Proving is perhaps the most mysterious part of the process. The goal here is to have air pockets form in the dough, which will end up as beautiful, irregular bubbles in the finished bread, giving the loaf size and improving the texture and taste. I prove my loafs for two one hour periods, stretching and folding the dough twice. This long proving period develops big bubbles and lets the sourdough flavour develop (a lot of the flavour from sourdough comes from a fermentation process in the dough – you can put the dough in the fridge to prove overnight to develop this flavour even more). The goal at the end of the prove is to have a dough that has evident bubbles – these should be obvious when you slash the top of the dough with a sharp knife. Once these bubbles are there, we can shape the loaf and let it rise before baking.
The goal of the rising stage is nicely measurable – we want the dough to double in size before it goes into the oven. Before it starts to expand like a dollar store dinosaur, though, we want to mold it into the proper shape. There’s a bit of a trick with dough shaping, but it’s not too tricky, particularly if you want to stick with one of the easier shapes (like a round). Once we’re shaped, the dough sits somewhere warmish and draft-free until it is 100% bigger than when it started. This increase in volume can be hard to eye, so I take a small piece of dough and put it into a clear cylindrical container. When the top of this test piece of dough is twice as high as when it started, we’re ready to get it all in the oven.
Finally, it’s time for the baking. One of the tragic lessons to be learned in breadmaking is that no matter how good your dough is, and how carefully you’ve proved and risen, you can still f&*k it all up in the last 30 seconds. Fully-risen dough is delicate, and the into-the-oven sequence needs to be very fast. I’m sure I’m not the only home baker who has shed a tear as a promising loaf slid onto the kitchen floor with a flatulent thump. This kind of accident is hard to avoid, but there are some tips to the bake that will help your loaf rise to the occasion. First, your oven should be good and hot. Pre-heat for at least 30 minutes. If you have a baking stone, you’ll probably want to let the stone absorb heat for even longer than that. Second, while it’s good be gentle with the dough, you need to be confident and deliberate. Quick movements are better than slow, tenuous ones. Like a ski-jumper, I usually try to visualize the whole sequence before I go for the real thing (yes, I realize how strange that sounds!). Finally, the first 15 or 20 minutes of the bake should be moist. Steam in the ‘oven spring’ stage, when the air pockets in the dough expand and the loaf rises to its final height, keeps the ‘skin’ of the bread flexible, and also helps develop a delicious chewy crust. I do this the easy way: every 5 minutes or so I spray the loaves liberally with a clean spray bottle of water.
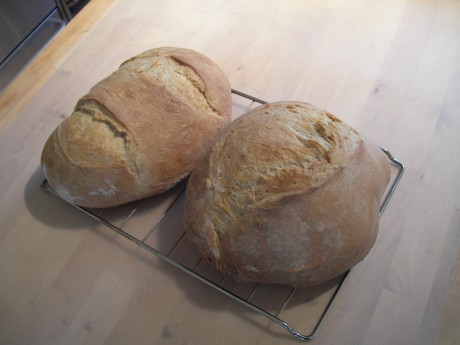
If all goes well, you should end up with some tasty, homemade sourdough bread. It’s a lot of work, but the payoff will be clear the first time you slice into a well-made loaf. This is home-cooking at its best, with little or no reliance on pre-packaged ingredients. Delicious!
Clean-up
I’ve mentioned them a couple of times already, but this article couldn’t have been written without the excellent resources at sourdough.com, – a fantastic place to learn how to make bread the ‘real’ way. I use the Pane Francese recipe from the site for my french bread laoves. I also enjoyed walking through the three-part breadmaking tutorial which gave me something to do while my starter was getting up to speed.
I’d love to hear from other home bakers who have tried sourdough – do you have any tips? Any recipe variations that have worked particularly well for you?
Finally, if someone wants a bit of sourdough starter to skip the 2 weeks wait at the start of the process, let me know!